Pages

Wednesday, April 15, 2015

An Up-Close Look at the Classroom Library

I know I've posted on this before, but I've had some questions. So here is the illustrated tour of my second grade classroom library:
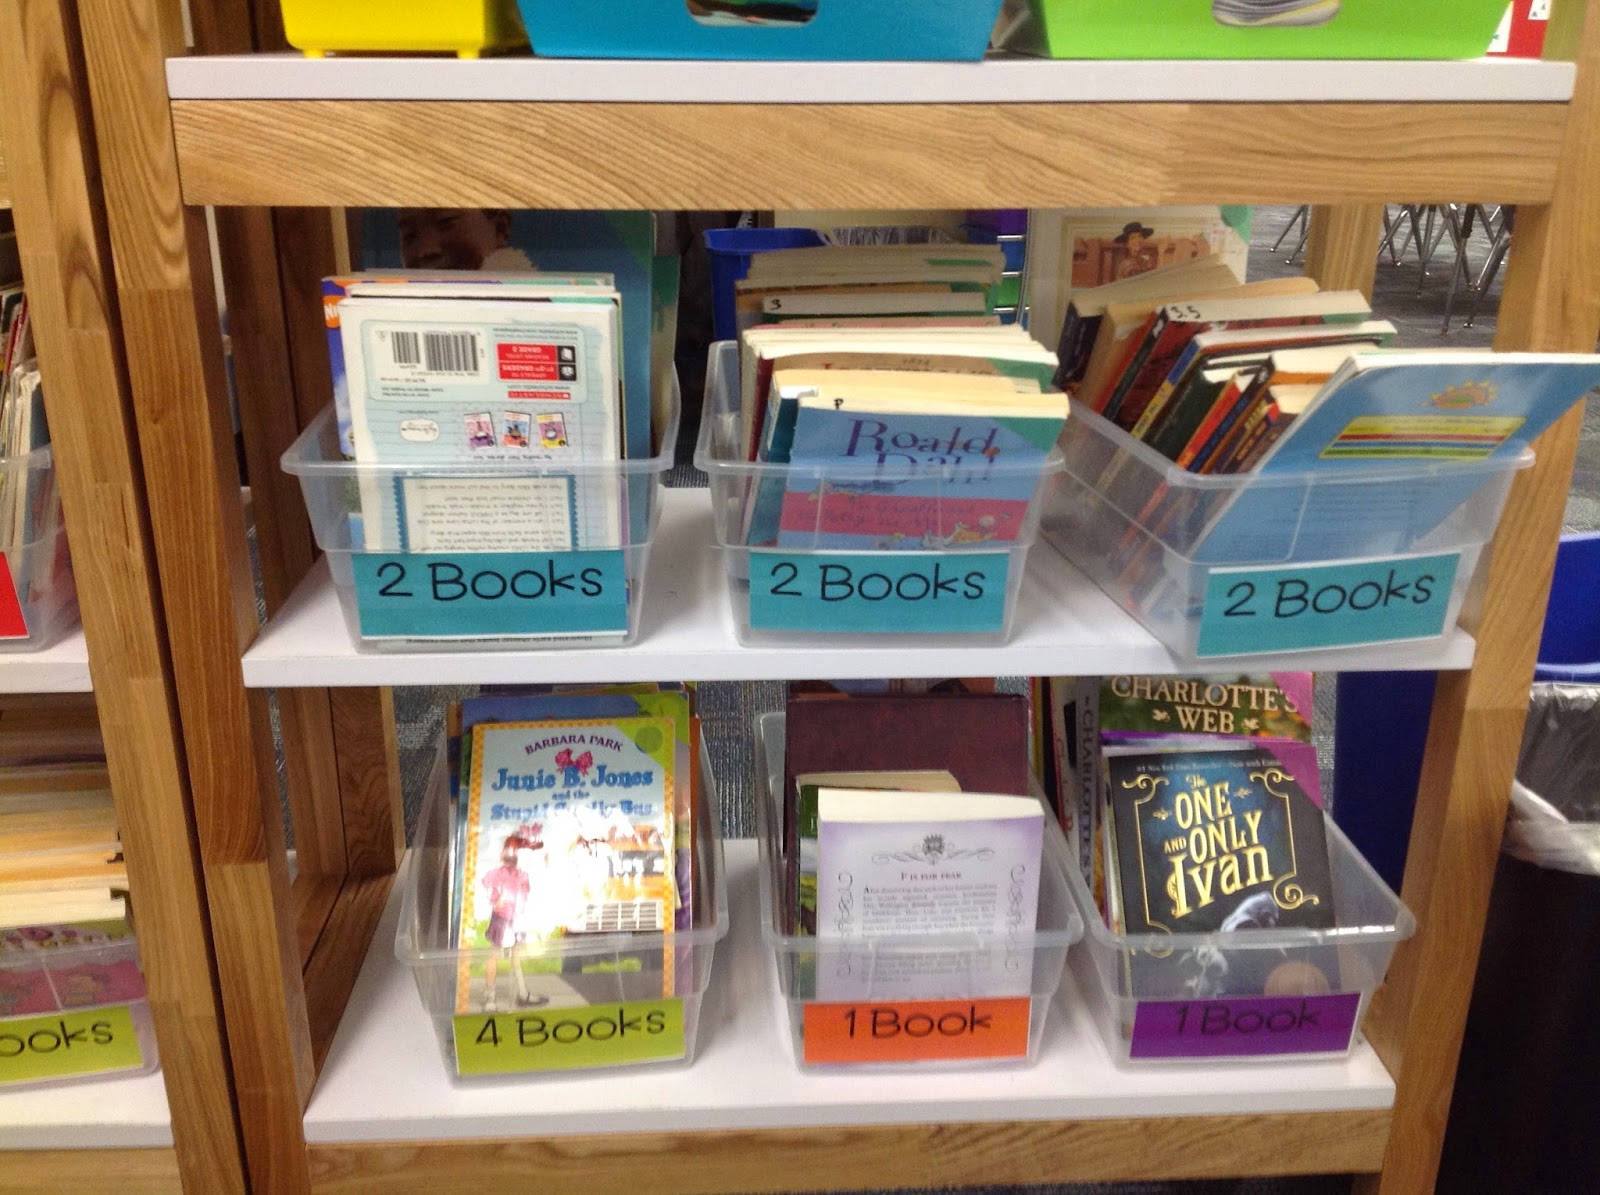
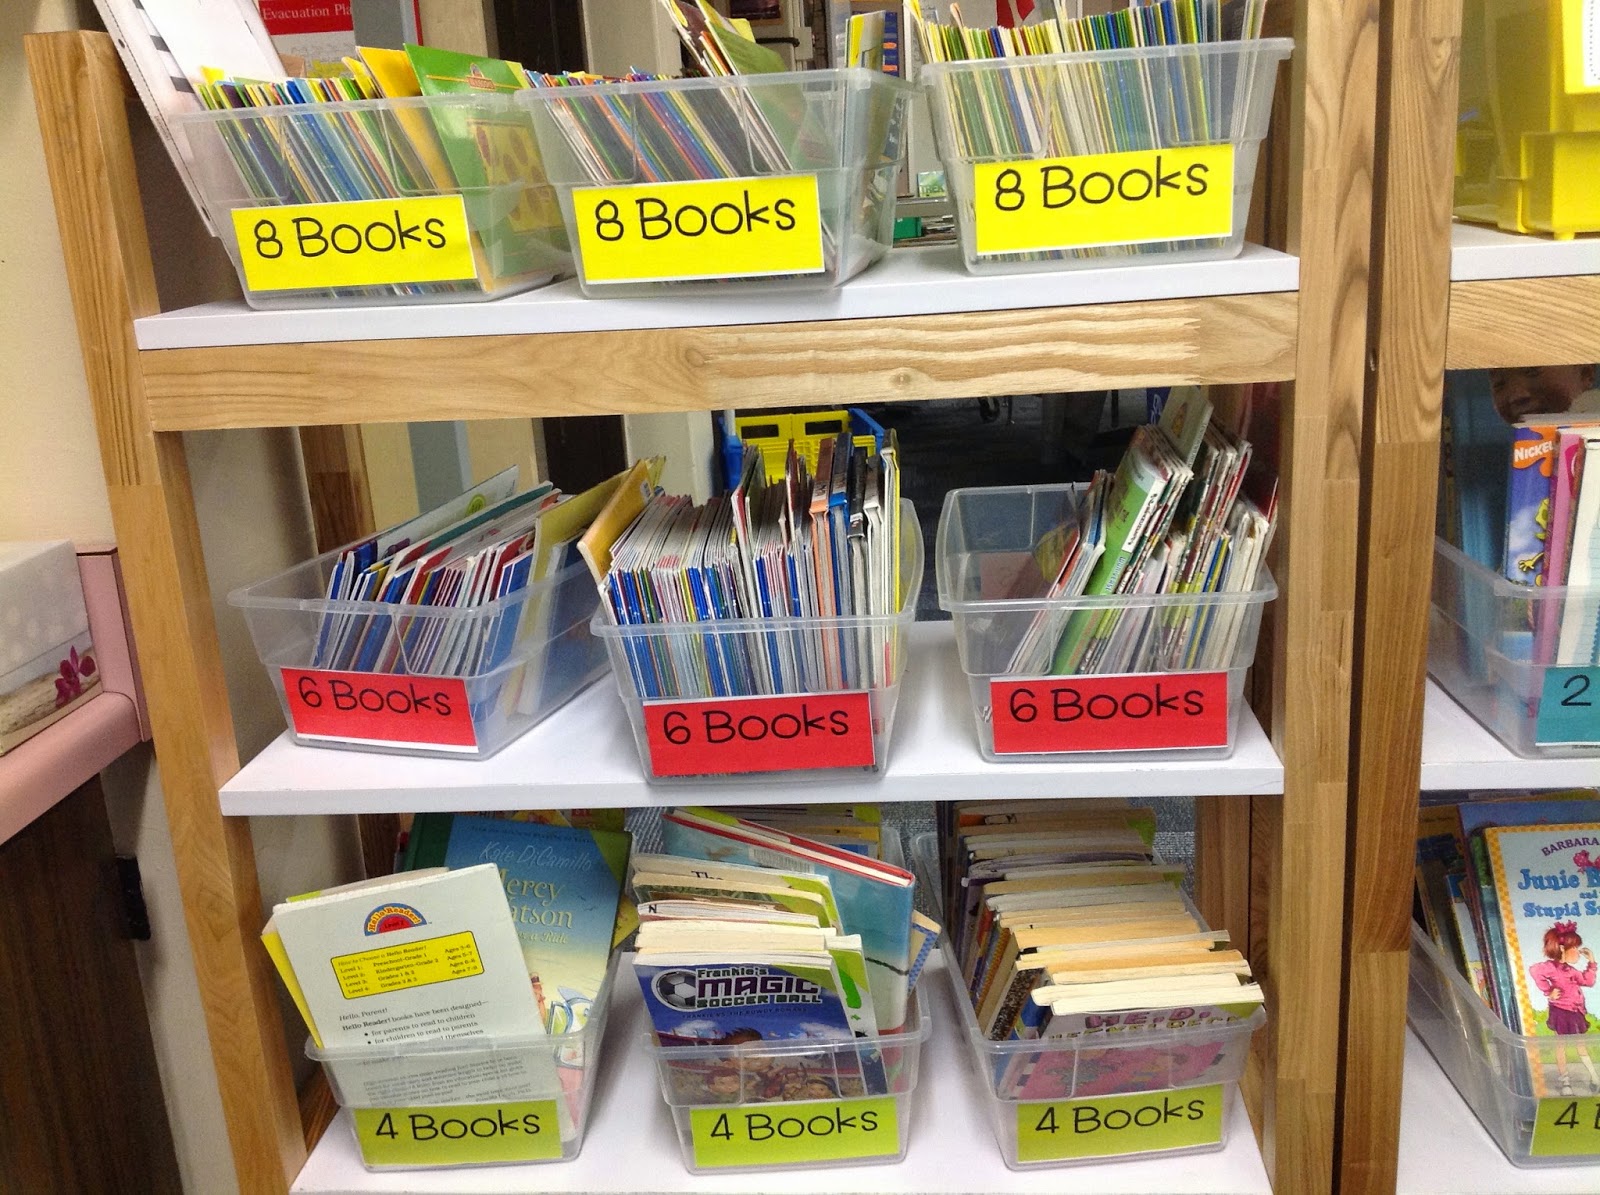
First off, the leveled book section...If you want to know more about the levels, how they correlate with F & P or DRA, see this post from the summer. Basically the important things to point out here is that the shelves were $20 each from Goodwill and the plastic bin were $5 for 6 at target. Well, thats not THE important thing....but its one of them :) The numbers on the outside are there to remind the students of how many of the level they should have in their book box at a time. They find out what bins they should take from in reading conferences with me. If you are familiar with levels of reading you know that the very beginning books are extremely short and students usually need 8-10 to keep busy reading. This is why they take a minimum of 8 books from yellow. I know there is discussion from teachers about how many chapter books should really be reading at the same time and so some of you might disagree with 4 lime green books or even 2 teal books in a book box at once. My thinking about that is this; at this very moment, I have 3 books on my nightstand and 2 in my purse. I am reading only 2 of them and the rest are lined up waiting for "their turn"....my students deserve to do the same!
 
You can see in the photos below that the books are not letter or number labeled...I gave that up when I switched my library organization up. Instead, I used colored masking tape on the corners to indicate the level and help with quick organization. Once again, if you want to know more about the color levels, see this post.

As far as the other books go (which I refer to choice books) here are the details:
  • I have them separated into literature text (animal characters, poetry, realistic fiction, etc) and informational texts (biographies, magazines, science, jobs, etc.) 
  • The books are each labeled in the top corner of the front corner of the cover and the informational text have a start sticker. This is how we tell informational apart from literature. 
  • I have the informational book bins on a counter and the literature text on some shelving that wraps around the room. 
  • Most students have just one of each kind at a time, sometimes more. 
  • The bins themselves are from IKEA and I have found them to be awesome storage for large books like these...


I really like this organization and for sure have had less issues with organization and book treatment this year. Taking the time to label and look for just the right bins was a pain, but I am so glad I did!


Anchor Charts

One of the things I love most about being an elementary teacher is creating things WITH my students that become permanent fixtures in my classroom. Anchor charts are one of those things. There are a few misconceptions out there about these little gems and I would like to address a few...

  1. You DO NOT have to draw well or have fancy handwriting to make them...truly...you DON'T
  2. They will not be wallpaper if you make them together, keep them within reach of you and your students, and reference even after the unit or lesson
  3. They are NOT the same as an electronic projected slide with bullet points and clip art...I don't know why, they're just NOT! No, actually that is not true. I know why. They are more permanent and community created, those are two reasons :)
  4. I DO have a goal of some things I would like to have on there, and often guide my students to their understanding of the concept or point through class discussion. I DON'T practice writing before or drawing
  5. Post-it correction tape is the BEST FRIEND of anchor chart makers!
Here are a few from my room that we made so far this year....


Math Tool Boxes

I've had a few questions about managing math manipulatives in my classroom from teachers that have stopped by and so I figured I would share what they look like, from the outside in and a little about my rationale for using them.
First off, they are NOT actually boxes (sorry if thats disappointing but I don't currently own 6 tool boxes.) They are cheap (like for 2 for $1 cheap) baskets. I have six total, because I have six student work tables.
This is where they live:
Sometimes I find them out and around the room, but it doesn't bother me because I know my students use them well and know when to use them. The idea is that the whole basket can be taken to the table and you can take out what you need, or even switch strategies in the middle of solving! I love how flexible students are with their thinking when given choices.
As far as the contents, here is what each has:
  • 5 number lines (0-30)
  • 5 100 charts
  • About 40 unifix cubes of the same color 
  • A set of place value blocks (4 hundreds, 25 tens, and 20 ones)
  • 20-30 clear plastic counting discs
  • Assorted coins (quarters, nickels, dimes and pennies)

Like I said, my students have learned to be flexible with these more than I could have even imagined and I'm grateful that we really haven't had sharing issues. Because the truth is, its not necessarily enough of any one material to lead a whole class lesson. I have more a "use what you need" policy and it has worked out fine. Here are some of the ways I have shown/observed students using them...
  • Counting out coins to represent amounts in a story problem, especially when needed to find the change given
  • Using the counters for simple addition and subtraction with students that are still building number sense and fluency
  • Number lines for adding and subtracting or solving "how many more" problems with small numbers
  • Unifix cubes stacked to compare amount and solve "whats the difference?" problems
  • 100 charts for skip counting support (laminated so we can write on them with dry erase!)
  • Place value blocks for adding and regrouping
  • Counters or ones cubes for making arrays in repeated addition/multiplication and division
Of course there are MANY more ways they can be used but those are pretty much the most frequent uses. I find that my students start out using them and with a little support can internalize the concepts enough that they do not need them when it comes to assessments. It has also been interesting to see some of my students that are strong in math find ways to model, explain and support for students that are struggling...using the toolkits! It's a fine like to walk between building knowledge and  giving them tools but its so important to be able to grab them when meaning starts to break down, so I am very glad I took the time to put them together and introduce them. 

Thursday, February 12, 2015

Practical writing instruction

One of the things I hear most often from teachers is about the struggle to find time for everything and make it all "fit together." I realize this can be difficult when special events and timed-to-the-minute daily schedules are the the norm, but I see it a little differently. One of the things I have committed to doing with my students a lot is low-risk-high-interest writing. And I am continually surprised by how often we can "fit it in." 

 For example, during our social studies unit on Citizenship, we studied many different current and historical figures that are examples of compassion, curiosity, commitment and community involvement. My students collected information about them in whatever way they would like in some research packets I created. The information was to be organized into those four C categories I just listed... but it didn't matter to me if they drew with labels, wrote full sentences, made a flow map of events or recorded important dates...just as long as it made sense to them.
After all the note-taking, it seemed like they still had a connection to these people, and in some cases lingering questions. Enter----letter writing opportunity! I took one day to show, study and explain a few letters (including the format of the one from MLK to JFK from the previous post) before sending them off to write one of their own. They were able to choose which person to write to and had only the following expectations;
  • Follow the letter format (greeting, body, salutation)
  • Identify one of the four Cs that the "Great Citizen" showed and the evidence
  • Ask one question
  • Thank them for their example
The results were wonderful as you can see, they really loved the chance to channel what they learned and write with purpose about something they had studied and cared deeply about. And the best part is, I thought of it in the car on the way to school, took 20 minutes to teach them how and 45 minutes to let them work...we got a lot out of that hour and 5 minute learning experience :)


Using primary source documents in primary grades

During my time at the Teacher's College Reading and Writing Project Institute last winter, I was reminded of the importance of sharing real pieces of history with our youngest learners. As we practiced deep thinking and literacy practice with primary source documents at the institute, I began to image what I could do in my classroom.
This winter, as my students began studying great citizens and we dove head first into content are literacy centers, I was delighted to go back to the Library of Congress website to retrieve a couple great pieces to share with them. If you haven't visited their site, you should! There is a classroom materials section and collections of primary source documents by theme.
Since most of great citizen study began with Martin Luther King Jr. I was immediately drawn to a letter that he wrote to JFK, just after he was inaugurated. It became the focal point of my "Write Around Center" and I was not disappointed by the engagement and conversations it sparked!

Sunday, January 25, 2015

Low-risk Writing

I committed myself to providing my students with a lot of low-risk writing this year. Note-taking, thinking maps, group planning, reader's response, and content literacy centers have all given and gotten a lot in this process. Not only do I find that their handwriting and spelling are improving, but their overall processing and willingness to write is blossoming quickly. My favorite part is that they are beginning to ask for and naturally grab for their journals...note-taking is more natural!

 We too often put so much pressure on our students to write polished pieces, but if I'm honest, most of the writing I do daily is not polished. Low-risk writing is changing my classroom and helping my students see themselves as writers more easily...I hope you try it too!

STEM DAY Creations